
Farming $MONSTRO (Alien Base)
Earn trading fees and farm rewards by adding liquidity to the $MONSTRO vault.
This guide explains how to farm $MONSTRO on Alien Base by adding liquidity to the $MONSTRO vault.
When you add liquidity, your position is automatically staked in the farm, allowing you to earn both trading fees and farm rewards without any additional steps.
Note
Some screenshots in this guide may show a different token pair for illustration purposes. The interface and steps are the same for the $MONSTRO vault.
Step 1: Open the Add Liquidity page on Alien Base from the Monstro site
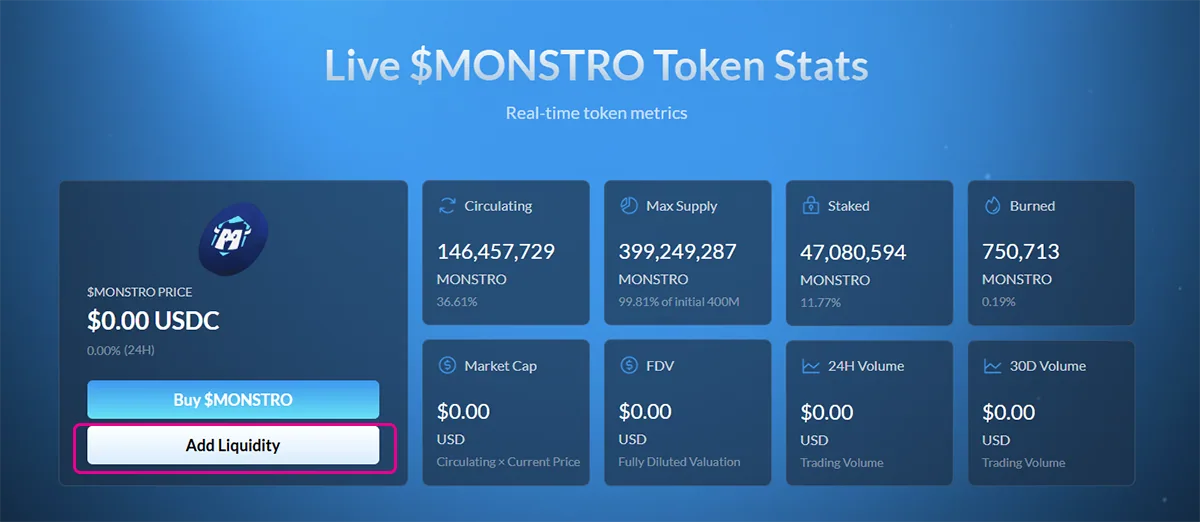
Visit the Monstro website in your browser and scroll down to the Token Stats section. Click Add Liquidity.
This will open Alien Base’s liquidity interface with the $MONSTRO / USDC pair pre-selected, helping ensure you are interacting with the correct pool.
Step 2: Connect your wallet on Alien Base
Once you are on Alien Base, click Connect in the top-right corner and approve the connection in your wallet.
You must be connected before you can view pools or add liquidity.

Step 3: Add liquidity from the vault page
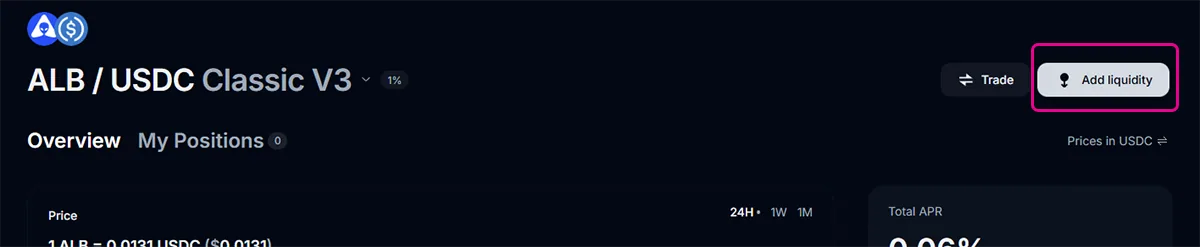
After connecting your wallet, you can add liquidity from the vault page.
Click Add liquidity to begin supplying tokens to the vault.
Step 4: Choose Zap and enter the amount
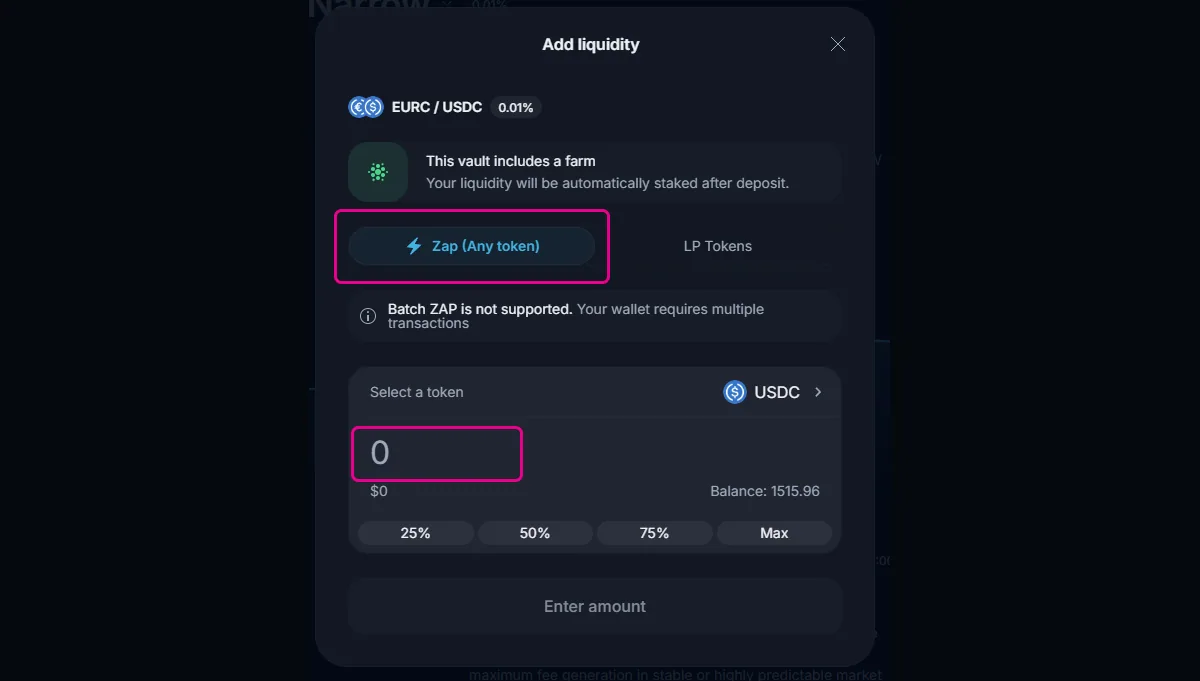
After clicking Add liquidity, the add liquidity modal will open.
This vault uses a managed price range and includes a farm. Liquidity added here will be automatically staked after deposit.
Make sure Zap (Any token) is selected. This allows you to add liquidity using a single token.
Select the token you want to supply and enter the amount.
Note
You do not need to supply both tokens when using Zap.
Step 5: Preview the Zap
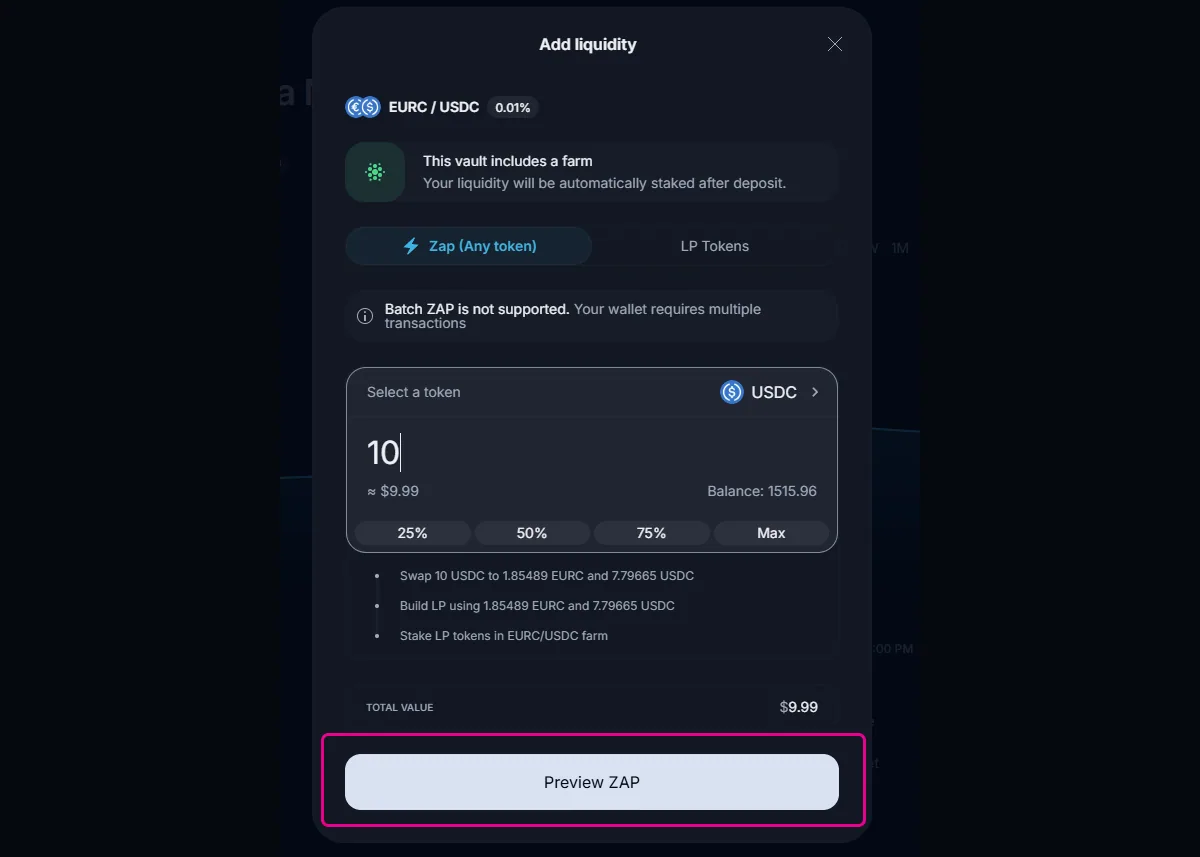
After entering the amount, click Preview ZAP.
This opens a summary showing how your tokens will be swapped, added as liquidity, and staked in the farm.
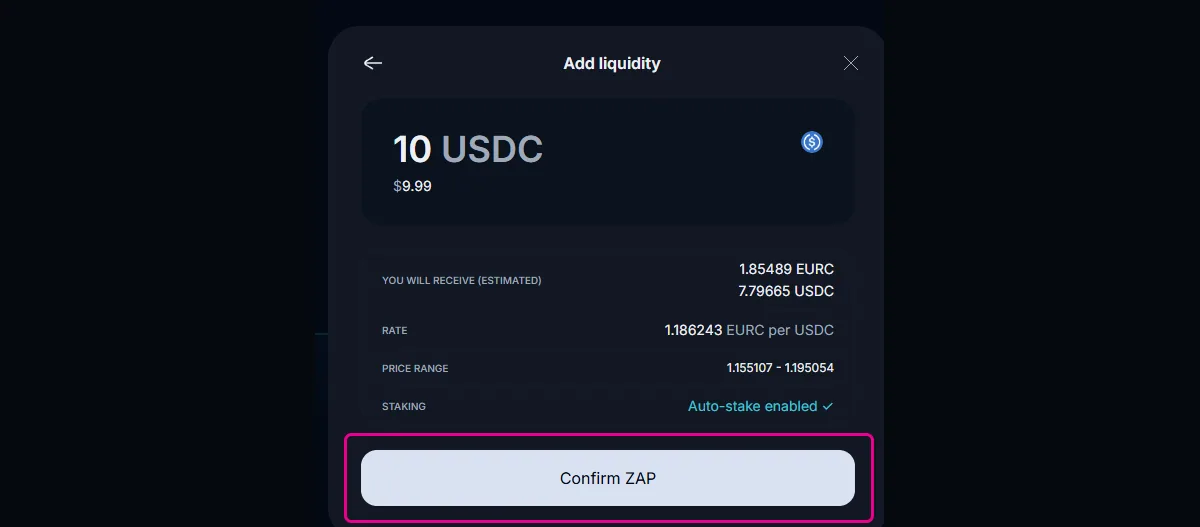
Step 6: Review and confirm the Zap
Review the details shown, including:
- Estimated token amounts
- Price range (managed by the vault)
- Auto-staking status
If everything looks correct, click Confirm ZAP.
Step 7: Approve and sign transactions
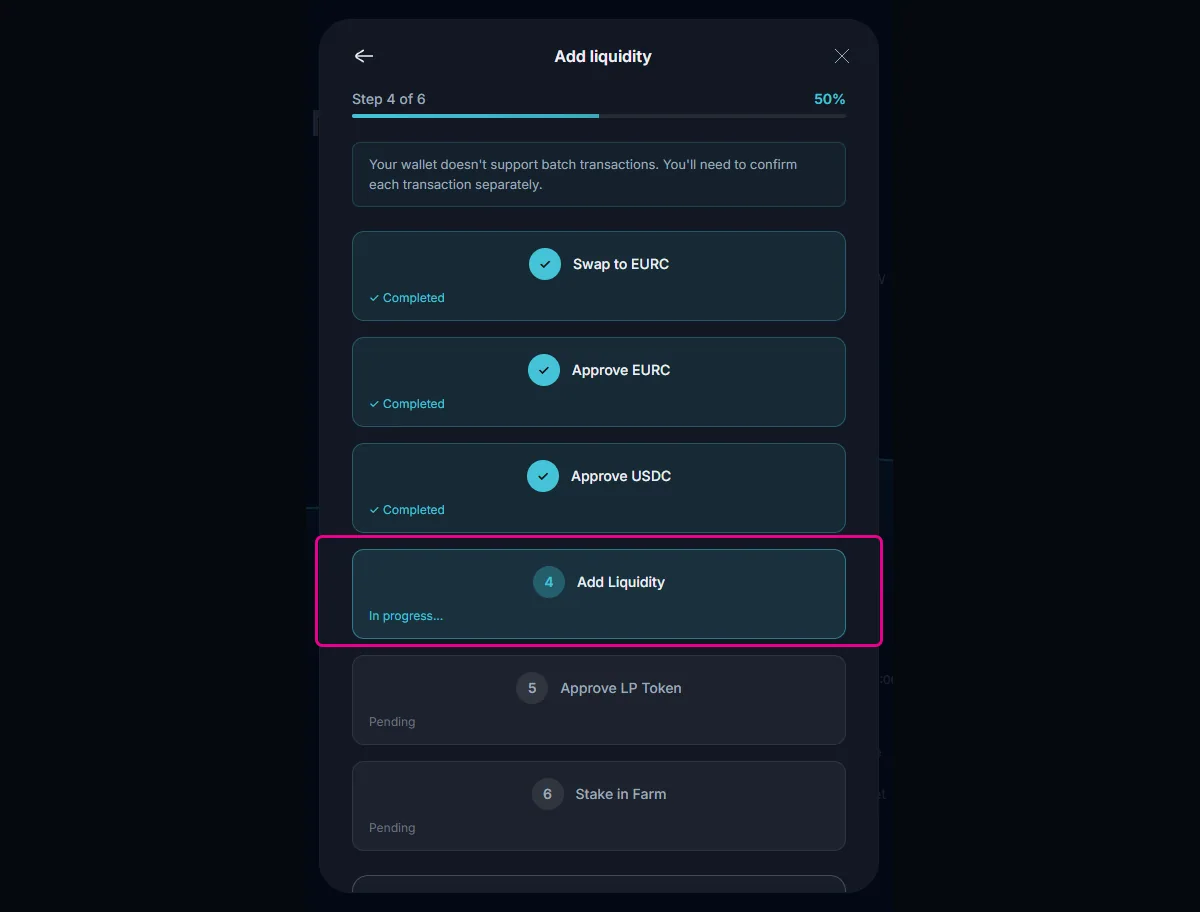
Depending on your wallet, you may be asked to confirm multiple transactions.
Some wallets support batch transactions and may complete this in a single approval.
Most wallets will guide you through several steps, such as:
- Swap tokens
- Approve token(s)
- Add liquidity
- Approve LP token
- Stake in farm
This is normal. Simply approve each step as prompted by your wallet.
Note
If your wallet does not support batch transactions, you will need to confirm each step individually. This does not change the outcome.
Step 8: Wait for completion
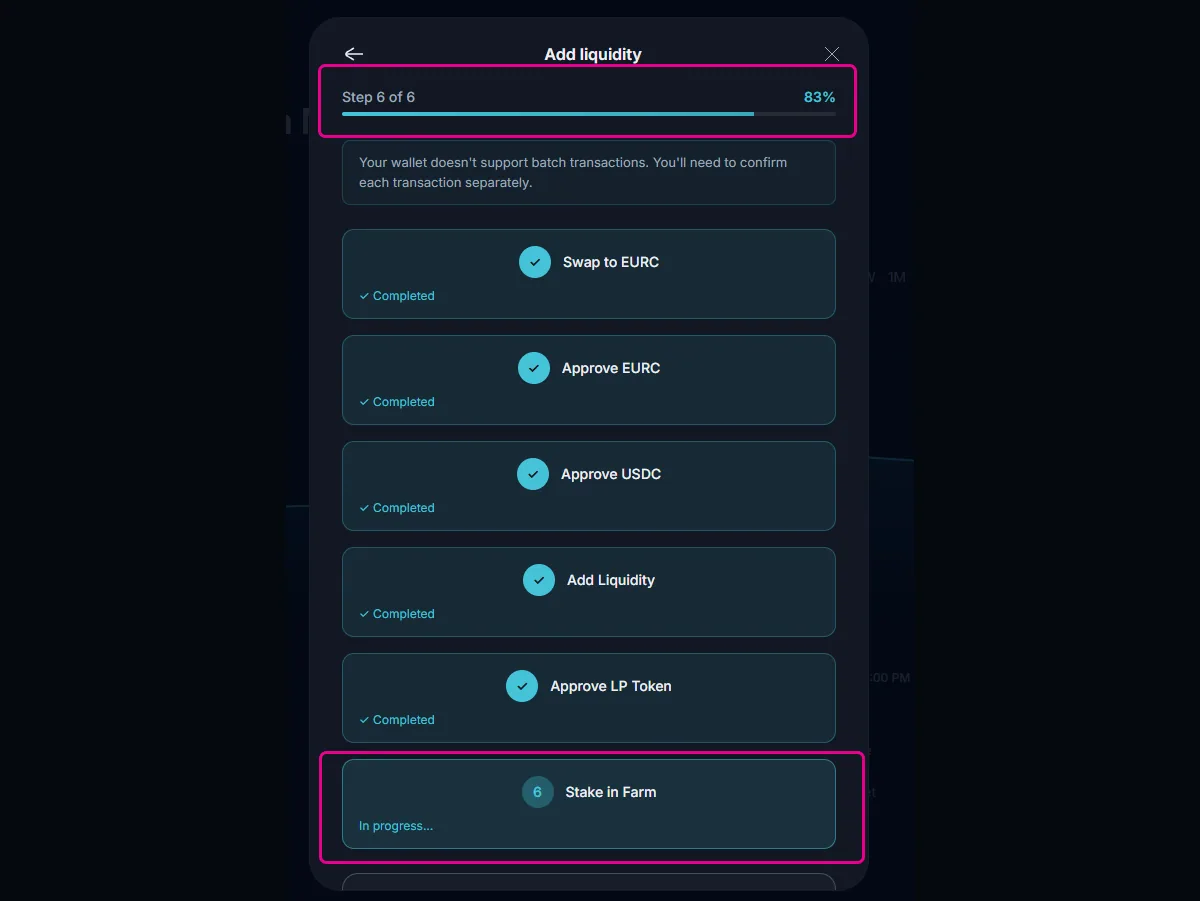
As each transaction completes, the progress indicator will advance automatically.
Do not close the window while steps are still in progress.
Step 9: Liquidity added and staked
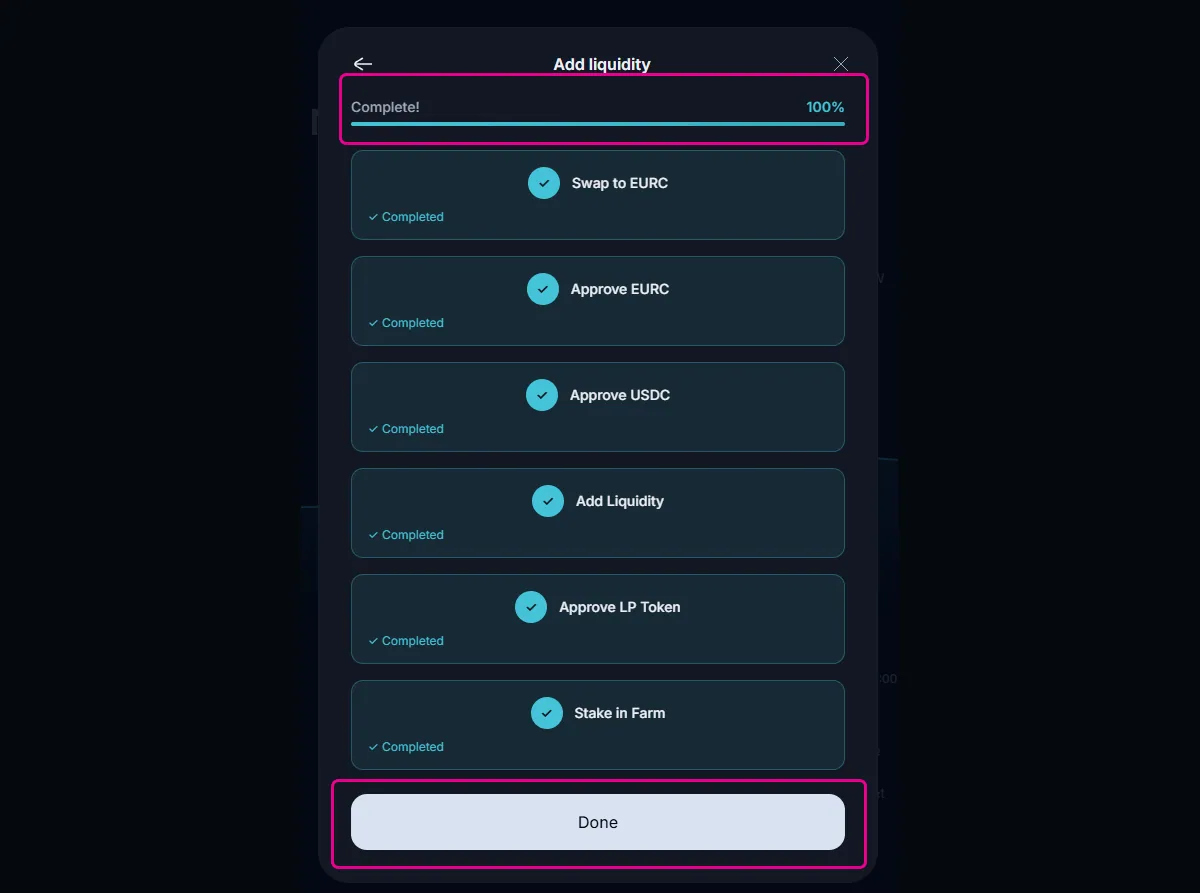
Once all steps are completed, you will see a confirmation screen indicating the process is complete.
Your liquidity has now been:
- Added to the vault
- Automatically staked in the farm
After completion: View your position
After clicking Done, reload the page if your position does not appear immediately.
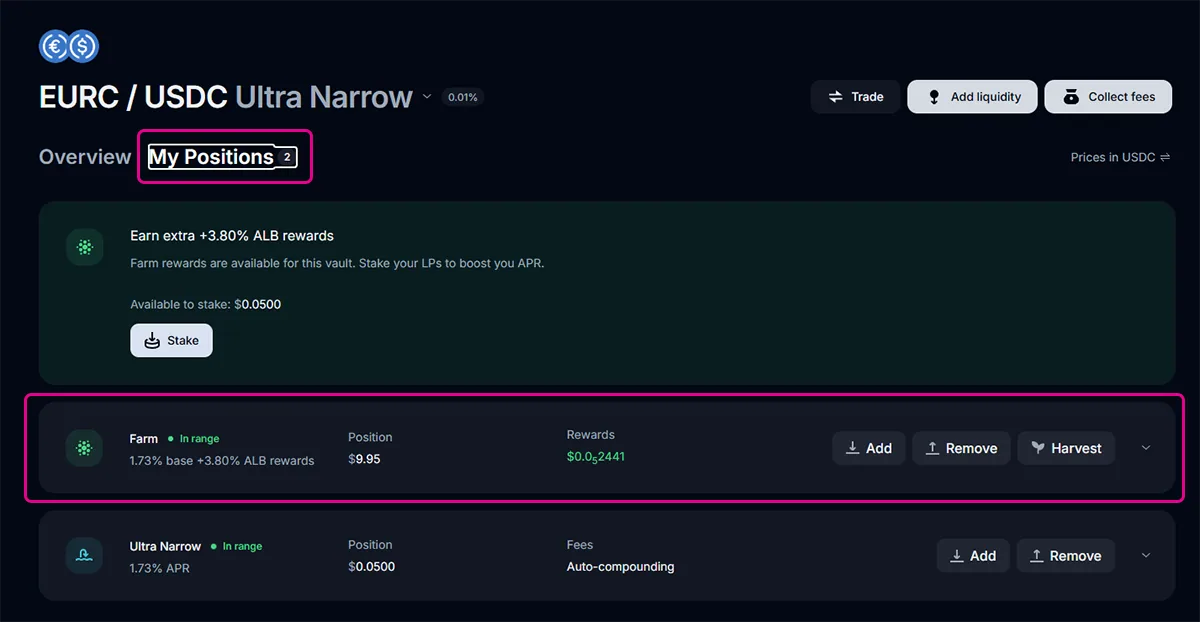
Once the page refreshes, open the My Positions tab to view your liquidity position and farm status.
Understanding what you’re seeing
You may see two rows for the same vault. This is normal.
- One row represents your liquidity position
- The other represents your staked position in the farm
Because this vault includes a farm, liquidity added through Zap is automatically staked.
Why it may show a small amount “available to stake”
You may see a small amount listed as available to stake. This is typically leftover dust from the Zap process and does not require any action unless you want to stake it.
About rewards and harvesting
Rewards accrue automatically over time. If rewards are available, they can be harvested from this page.
Last updated